Skip to content
Uganda Wildlife Photography Tips: The Complete Guide to Capturing Remarkable Safari Images
Uganda is one of Africa’s most rewarding destinations for wildlife photographers. Its landscapes range from mist-covered mountain forests and tropical wetlands to open savannahs, volcanic slopes, crater lakes, and the mighty River Nile. Within these varied habitats, photographers can encounter mountain gorillas, chimpanzees, tree-climbing lions, elephants, leopards, giraffes, shoebill storks, and more than 1,000 recorded bird species.
However, successful wildlife photography requires more than an expensive camera. You need patience, careful observation, appropriate settings, respectful behavior, and an understanding of how animals respond to their surroundings. Light, weather, vegetation, vehicle position, and timing can all determine whether you return with an ordinary snapshot or a powerful photograph.
These Uganda wildlife photography tips will help beginners, enthusiasts, and experienced photographers prepare for a productive safari. The guide covers camera equipment, recommended settings, gorilla and chimpanzee photography, bird photography, national parks, lighting, composition, ethical practices, and safari planning.
Whether you use a professional mirrorless camera, a DSLR, a compact camera, or a smartphone, Uganda offers exceptional opportunities to create meaningful wildlife images.
Why Uganda Is an Outstanding Wildlife Photography Destination
Uganda is often called the Pearl of Africa because of its natural beauty, fertile landscapes, welcoming communities, and extraordinary biodiversity. For photographers, its greatest advantage is variety.
During a single journey, you can photograph lions on the Kasenyi Plains, elephants beside the Kazinga Channel, chimpanzees beneath Kibale’s forest canopy, mountain gorillas in Bwindi, and shoebill storks in the wetlands of Mabamba Bay.
Uganda’s photographic appeal comes from several factors:
- Diverse ecosystems within relatively manageable travel distances
- Rare primates, including mountain gorillas and chimpanzees
- Excellent birdwatching and bird photography
- Classic African mammals in savannah parks
- Dramatic mountains, waterfalls, lakes, rivers, and forests
- Less crowded safari areas than some better-known African destinations
- Opportunities for vehicle, boat, walking, and forest photography
- Rich cultural experiences that can complement wildlife images
- Strong potential for conservation and documentary photography
The country does not offer only one type of safari. Instead, it combines primate trekking, traditional game drives, river cruises, wetland excursions, forest walks, and cultural encounters. This diversity allows photographers to build a more complete visual story.
Essential Uganda Wildlife Photography Tips Before Your Safari
Preparation has a major influence on your results. Wildlife rarely behaves according to a fixed schedule, so photographers must be ready when an opportunity appears.
Before travelling, learn about Uganda’s animals, seasons, habitats, and photography regulations. Think about the images you want to create, but remain flexible. A safari rarely follows a perfect plan.
Research your subjects
Study the likely behavior of the animals you hope to photograph. Knowing basic behavior helps you anticipate movement rather than reacting too late.
For example:
- Lions may become active around sunrise or late afternoon.
- Elephants frequently move toward water during warmer periods.
- Birds often become more active early in the morning.
- Hippos may leave the water as evening approaches.
- Chimpanzees can move rapidly through the forest canopy.
- Gorillas may feed, rest, play, or travel through dense vegetation.
- Leopards frequently use trees, bushes, or shaded areas during the day.
Behavioral knowledge helps you prepare your focus point, shutter speed, composition, and lens before the action begins.
Understand park rules
Photography regulations protect wildlife, visitors, and sensitive habitats. Certain locations may restrict flash photography, drones, vehicle movement, or close approaches.
During primate trekking, always listen to the ranger’s instructions. Mountain gorillas and chimpanzees are wild animals, and their wellbeing must take priority over photography.
Prepare for changing conditions
Uganda’s climate can change quickly. A bright morning may become cloudy or rainy within a short period. Forests can be dark even during the middle of the day, while open savannahs may produce intense sunlight and strong contrast.
Prepare for:
- Rain
- Dust
- Humidity
- Low light
- Bright midday sun
- Sudden animal movement
- Uneven forest terrain
- Long periods inside a safari vehicle
- Boat spray during water-based activities
Practise before departure
Do not wait until you see a gorilla or leopard to learn how your camera works. Practise changing settings without looking away from the viewfinder.
You should be comfortable with:
- Changing ISO quickly
- Adjusting shutter speed
- Moving focus points
- Switching between autofocus modes
- Changing exposure compensation
- Using burst mode
- Reviewing the histogram
- Locking exposure
- Switching between still photography and video
- Changing lenses safely
Photograph moving pets, birds, bicycles, or vehicles before your trip. These exercises can improve your reaction time.
Choosing the Best Camera for a Uganda Safari
The best camera is one that you understand and can operate confidently. Professional equipment can improve image quality, autofocus performance, and low-light results, but technique remains more important than price.
Mirrorless cameras
Modern mirrorless cameras are excellent for wildlife photography. They generally provide fast autofocus, electronic viewfinders, high burst rates, silent shooting, and sophisticated subject-detection systems.
Their advantages may include:
- Animal and bird eye detection
- Fast continuous shooting
- Good video capability
- Compact body designs
- Accurate exposure previews
- Strong low-light performance
However, electronic viewfinders and continuous autofocus can consume battery power quickly. Carry several charged batteries.
DSLR cameras
A quality DSLR remains a capable wildlife photography tool. DSLRs offer reliable autofocus, excellent battery life, durable construction, and access to a wide range of lenses.
Photographers who already own a DSLR do not need to replace it simply because mirrorless equipment has become popular. A familiar camera often delivers better results than a new system you have not mastered.
Compact and bridge cameras
Bridge cameras with long built-in zoom lenses can be practical for travellers who do not want to carry several lenses. Some offer impressive focal ranges, although their smaller sensors may struggle in dark forests or at high ISO settings.
They can still be useful for savannah animals, birds in good light, and general travel photography.
Smartphone photography
Modern smartphones can produce attractive images, especially for landscapes, nearby animals, wide scenes, and video. Nevertheless, digital zoom usually reduces image quality. Phones are also less effective for distant wildlife and fast action.
Use the main optical camera whenever possible. Brace the phone against a stable surface, avoid excessive zoom, and tap the animal’s face or eye to set focus and exposure.
Best Lenses for Wildlife Photography in Uganda
Lens choice influences framing, subject isolation, low-light performance, and how much equipment you need to carry.
Telephoto zoom lenses
A telephoto zoom is the most flexible choice for a Uganda safari. Useful ranges include:
- 70–200mm
- 100–400mm
- 150–500mm
- 150–600mm
- 200–500mm
A 100–400mm lens is especially versatile. It can capture large mammals at moderate distances while still providing enough reach for many birds and smaller animals.
A 150–600mm lens offers greater reach for bird photography, but it can be heavy inside a vehicle or during a forest trek.
Medium-range zoom lenses
A lens such as 24–70mm, 24–105mm, or 70–200mm is useful when animals approach the vehicle. It is also valuable for environmental portraits, landscapes, lodges, cultural experiences, and photographs that show wildlife within its habitat.
Wide-angle lenses
Wide-angle lenses are not normally the first choice for distant wildlife. However, they are excellent for:
- Landscapes
- Dramatic skies
- Forest environments
- Safari camps
- Waterfalls
- Crater lakes
- Environmental wildlife scenes
- Cultural and documentary photographs
Fast lenses
Lenses with wide maximum apertures, such as f/2.8 or f/4, allow more light into the camera. They are especially useful in Bwindi Impenetrable National Park, Kibale National Park, and other shaded forests.
Their main disadvantage is cost and weight. A lighter zoom with image stabilization may be more practical for many travellers.
Teleconverters
A teleconverter increases the reach of a compatible lens. However, it may reduce maximum aperture and autofocus performance. It is most useful in strong light and when photographing distant birds or mammals.
Test the combination before travelling. Not every lens performs equally well with a teleconverter.
Essential Camera Accessories
A carefully selected accessory kit makes photography safer and more efficient.
Memory cards
Carry several reliable, high-speed memory cards. Fast cards are important when using continuous shooting or recording high-resolution video.
Using several smaller cards can reduce the risk of losing an entire trip’s photographs if one card becomes damaged. Keep used cards separate from empty cards.
Spare batteries
Cold mountain mornings, electronic viewfinders, image review, video, GPS, and continuous autofocus can drain batteries quickly. Carry at least two or three spare batteries for a full day.
Charge everything each evening whenever electricity is available.
Rain protection
Uganda’s forests and mountain regions can receive rain throughout the year. Protect equipment with:
- A dedicated rain cover
- A waterproof backpack cover
- Resealable plastic bags
- Microfiber cloths
- Silica gel packets
- A dry bag for boat trips
Avoid changing lenses in heavy rain.
Cleaning equipment
Dust is common on unpaved safari roads. Carry:
- A hand-operated air blower
- Lens-cleaning cloths
- A soft brush
- Lens-cleaning solution
- Protective lens caps
- Sensor-cleaning supplies only if you know how to use them safely
Never wipe a dusty lens immediately. First, remove loose particles with a blower or soft brush.
Support systems
Large traditional tripods are often impractical inside safari vehicles. More useful options include:
- A beanbag
- A monopod
- A compact travel tripod
- A window support
- A lens stabilization system
- A padded jacket placed beneath the lens
A beanbag is one of the simplest and most effective supports for vehicle-based wildlife photography.
Backup storage
Back up photographs whenever possible. A practical system may include:
- Original files on the memory card
- A copy on a laptop or portable drive
- A second copy on another drive or secure cloud service when internet access permits
Do not format the cards until you have confirmed that the files exist in at least two safe locations.
Camera Settings for Uganda Wildlife Photography
There is no single perfect group of settings. The correct exposure depends on the subject, light, background, focal length, and desired effect.
Nevertheless, the following Uganda wildlife photography tips provide a dependable starting point.
Use a fast shutter speed for movement
Shutter speed controls how motion appears. A slow shutter speed may produce blur, while a fast speed helps freeze movement.
Suggested starting points include:
- Resting large mammals: 1/500 second
- Walking mammals: 1/800 to 1/1250 second
- Running animals: 1/1600 to 1/2500 second
- Perched birds: 1/800 to 1/1600 second
- Birds in flight: 1/2000 to 1/4000 second
- Quiet primates: 1/250 to 1/500 second
- Moving primates: 1/800 second or faster
- Handheld long lenses: at least 1/1000 second when possible
These are guidelines rather than fixed rules. Stabilization and good technique may allow slower speeds, but animal movement can still cause blur.
Select an appropriate aperture
A wide aperture such as f/2.8, f/4, or f/5.6 admits more light and can soften the background. This helps separate an animal from distracting vegetation.
However, very wide apertures produce shallow depth of field. If the subject is close, one eye may appear sharp while other important features become soft.
For an individual animal, start around f/4 to f/6.3. For a group of animals, consider f/8 or f/11 when light permits.
Use Auto ISO carefully
Auto ISO is useful when animals move between sunlight and shade. You can choose the shutter speed and aperture while the camera adjusts ISO.
Set a reasonable maximum ISO based on your camera’s performance. It is often better to capture a sharp photograph with some noise than a clean but blurred photograph.
Choose continuous autofocus
Continuous autofocus—often called AF-C or AI Servo—helps maintain focus as an animal moves.
For stationary wildlife, single autofocus can work. However, animals may move without warning, so many photographers keep continuous autofocus enabled throughout a game drive.
Use animal-eye autofocus when available
Animal-eye detection can improve accuracy, especially with mammals and birds. Still, it is not perfect. Branches, grass, low contrast, or poor light may confuse the system.
Learn how to switch quickly to a single focus point when automatic subject detection fails.
Shoot in burst mode
Continuous shooting increases the chance of capturing the best expression, wing position, or moment of action. Use short, controlled bursts instead of holding the shutter continuously.
This method reduces duplicate images and makes editing easier.
Photograph in RAW format
RAW files retain more information than JPEG files. They provide greater flexibility when correcting exposure, recovering shadows, adjusting white balance, and reducing noise.
If you need photographs immediately, use RAW plus JPEG. However, this requires more storage space.
Check exposure compensation
Dark animals against bright backgrounds can appear underexposed. Light animals against dark vegetation may appear overexposed.
Use positive exposure compensation when the subject is too dark and negative exposure compensation when bright areas are losing detail.
For example, a gorilla surrounded by bright green leaves may require positive compensation. A pale bird against dark water may require negative compensation.
Protect highlights
Once bright highlights become completely white, detail can be difficult or impossible to recover. Check your histogram and highlight warning when conditions are challenging.
Pay special attention to:
- White feathers
- Bright skies
- Wet animal fur
- Sunlit water
- Pale faces
- Light-colored horns
Understanding Light on a Uganda Safari
Photography is fundamentally about light. Wildlife, location, and equipment matter, but light determines mood, texture, color, and depth.
Early morning light
Sunrise often provides soft, warm light and long shadows. Animals are also more active before temperatures rise.
Morning photography can produce:
- Warm color
- Misty landscapes
- Backlit dust
- Reflections on calm water
- Active predators
- Birds feeding or calling
- Strong silhouettes
Begin game drives early enough to be in a productive area when the light improves.
Late afternoon light
The hours before sunset offer another valuable photography period. Warm light can reveal texture in fur, feathers, tree bark, and grass.
As evening approaches, raise ISO and monitor shutter speed. Light levels may fall faster than expected.
Midday light
Harsh midday light creates strong contrast and deep shadows. However, it is still possible to create good photographs.
Try:
- Converting suitable images to black and white
- Photographing animals in open shade
- Looking for reflections near water
- Using tight compositions
- Capturing behavior rather than portraits
- Underexposing slightly for silhouettes
- Photographing bright birds against clean backgrounds
- Using clouds to soften direct sunlight
Overcast conditions
Cloud cover acts like a large natural diffuser. It reduces contrast and produces even light, which is often excellent for forest animals and detailed portraits.
Overcast weather may require higher ISO settings, but it can preserve detail in dark fur and bright vegetation.
Backlighting
Backlighting occurs when the light comes from behind the subject. It can create glowing fur, illuminated dust, rim light, silhouettes, and a strong sense of atmosphere.
Expose carefully. Decide whether you want detail in the subject or a dark silhouette. Both approaches can be effective when intentional.
Composition Tips for Stronger Wildlife Images
Technical sharpness alone does not create a compelling wildlife photograph. Composition determines how the viewer experiences the scene.
Focus on the eyes
The eyes are usually the most important part of an animal portrait. If the eyes are sharp, viewers may accept slight softness elsewhere. If the eyes are out of focus, the photograph often feels unsuccessful.
Place the focus point directly over the nearest visible eye.
Photograph at eye level
Eye-level photography creates a stronger sense of connection. From a safari vehicle, this may not always be possible, but a lower position can still improve the result when it is safe and permitted.
Never leave a vehicle or change position without your guide’s permission.
Leave space in the direction of movement
When an animal looks or moves to one side, leave space in front of it. This creates visual balance and allows the viewer to imagine where it is going.
Use the rule of thirds
Place the subject away from the exact center when the surrounding habitat adds meaning. The rule of thirds is a helpful guide, although it should not become a strict limitation.
Centered compositions can work well for symmetry, direct eye contact, reflections, and formal portraits.
Watch the background
A distracting background can weaken an otherwise excellent image. Before taking the photograph, look for:
- Branches appearing to grow from the animal’s head
- Bright patches near the frame edges
- Other vehicles
- Cut-off animals
- Strong horizon lines crossing the subject
- Unwanted human objects
- Messy vegetation
- Areas of extreme brightness
Sometimes moving the camera only a few centimeters can improve the background.
Include the environment
Close portraits are attractive, but environmental images often tell a richer story. Show an elephant beneath a dramatic sky, a gorilla within dense forest, or a kob surrounded by golden grass.
Capture several perspectives:
- Wide habitat view
- Full-body animal image
- Medium portrait
- Tight facial detail
- Behavioral sequence
Avoid cutting joints awkwardly
If you cannot include the entire animal, crop deliberately. Avoid cutting through knees, ankles, paws, or important features. Tight portraits should look intentional.
Use natural frames
Leaves, branches, grass, rocks, and tree trunks can frame a subject. Natural framing adds depth and can communicate the hidden character of forest wildlife.
Ensure foreground elements contribute to the composition rather than blocking the animal’s face.
Uganda Wildlife Photography Tips for Gorilla Trekking
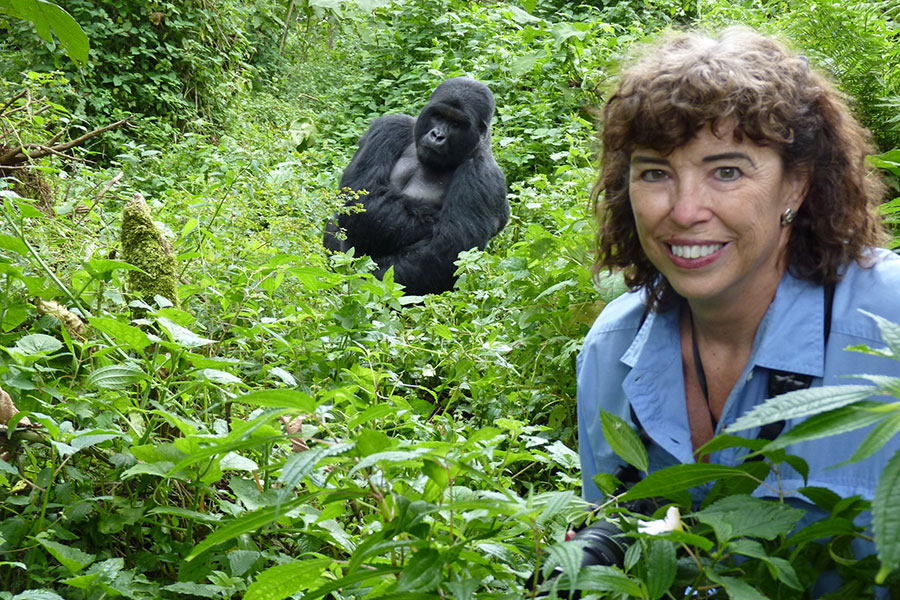
Mountain gorilla photography is one of Uganda’s most powerful travel experiences. Gorilla trekking is available in Bwindi Impenetrable National Park and Mgahinga Gorilla National Park.
The environment is challenging. Light can be limited, vegetation is dense, terrain may be steep, and the gorillas may change position frequently.
Travel light during the trek
You may walk for several hours before reaching the gorillas. Carry only what you can manage safely.
A useful gorilla photography kit may include:
- One camera body
- A second body if weight allows
- A 70–200mm or 100–400mm zoom
- A wider lens for environmental photographs
- Spare battery
- Empty memory card
- Rain cover
- Lens cloth
- Water in a secure bottle
- A waterproof camera bag
Hiring a local porter is highly recommended. Porters can carry equipment and help on difficult sections of the trail. Their work also provides direct economic benefits to nearby communities.
Do not use flash
Flash photography is generally prohibited around mountain gorillas. In addition, flash can disturb animals and flatten the natural atmosphere of the forest.
Instead, use a wider aperture, raise ISO, and stabilize your camera.
Prepare for low light
Start with a shutter speed of approximately 1/500 second for moderately active gorillas. If a gorilla is resting, you may be able to use 1/250 second with careful technique. For playing juveniles, aim for 1/800 second or faster.
Use continuous autofocus and short bursts. Watch the eyes carefully because dark fur and deep shadows can challenge autofocus.
Expose for dark fur
A camera may underexpose a gorilla because it sees bright leaves in the background. Use positive exposure compensation when necessary. Review the histogram, but avoid checking every image and missing the experience.
Anticipate expressions and interaction
Strong gorilla photographs frequently show:
- Eye contact
- Feeding
- Grooming
- Family interaction
- A mother with an infant
- Juvenile play
- Movement through vegetation
- Hands and facial details
- A gorilla framed by leaves
- An environmental portrait
Remain quiet, follow the ranger’s directions, and avoid sudden movements.
Respect the viewing distance
Never move closer merely to fill the frame. Follow the required distance and any additional instructions from the ranger.
Sometimes a gorilla may approach visitors. In that situation, remain calm and follow the ranger’s guidance. Do not reach toward the animal.
Experience the moment
It is easy to spend the entire encounter looking through a viewfinder. Take photographs, but also lower the camera occasionally. The experience itself is as important as the images.
Chimpanzee Photography in Uganda
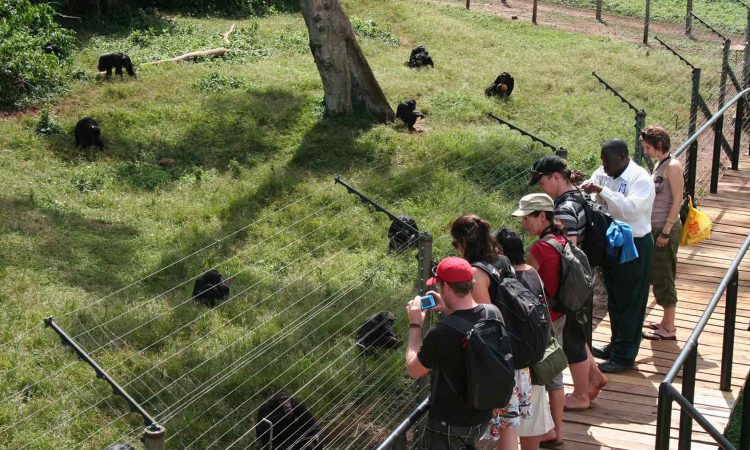
Chimpanzees are faster and often more difficult to photograph than gorillas. They may travel on the ground, climb trees, rest in thick vegetation, or move rapidly through the canopy.
Kibale National Park is Uganda’s best-known chimpanzee trekking destination. Other possibilities include Budongo Forest, Kyambura Gorge, and Kalinzu Forest.
Use fast autofocus and shutter speeds
Continuous autofocus is essential. Begin around 1/800 second and increase the shutter speed when chimpanzees are active.
A shutter speed of 1/1600 second or faster may be necessary for climbing, running, or swinging behavior.
Raise ISO when necessary
Forest light can be extremely limited. Modern cameras can produce usable results at relatively high ISO settings. Do not sacrifice sharpness simply to keep ISO low.
Noise-reduction software can improve a sharp file. It cannot fully repair motion blur.
Watch for openings in the vegetation
Instead of trying to photograph through a wall of leaves, predict where a chimpanzee may move. Focus on an opening and wait.
This approach can produce cleaner compositions and reduce autofocus problems.
Follow the face
Chimpanzee expressions and social interactions create memorable images. Watch for grooming, communication, feeding, resting, parenting, and group movement.
Take both horizontal and vertical frames. Vertical compositions often work well for chimpanzees sitting against tree trunks.
Bird Photography in Uganda
Uganda is one of Africa’s leading birdwatching destinations. Its location connects East African savannah, Central African forest, wetlands, mountains, and the Lake Victoria basin.
Notable birds include the shoebill, African fish eagle, great blue turaco, grey crowned crane, African green broadbill, saddle-billed stork, kingfishers, bee-eaters, hornbills, and numerous Albertine Rift endemics.
Use a long lens
A focal length of 400mm to 600mm is useful for small or distant birds. Crop-sensor cameras can provide additional apparent reach.
However, long focal length increases the risk of camera shake. Maintain a fast shutter speed and support the lens whenever possible.
Use bird-eye detection
Bird-eye autofocus can be extremely effective when the bird is clearly visible. If branches confuse the autofocus system, switch to a small focus area or single point.
Set a fast shutter speed
For perched birds, begin around 1/1000 second. For birds in flight, use 1/2000 to 1/4000 second depending on size, speed, and direction.
Larger birds flying steadily may require less speed than small, rapidly moving birds.
Learn bird behavior
Behavior helps predict action. A bird may lean forward immediately before taking flight. A kingfisher may return to the same perch. A bee-eater may launch from a branch, catch an insect, and return.
Observation makes bird photography more successful than random continuous shooting.
Photograph at the bird’s level
When safe, use a lower perspective. Eye-level photographs create stronger background separation and a more intimate connection.
During boat trips, a low seating position may provide an attractive angle without disturbing wildlife.
Avoid nesting disturbance
Never approach a nest too closely or block the parents’ access. Avoid playing recorded calls repeatedly to attract birds. Ethical fieldcraft protects birds from unnecessary stress.
Photographing the Shoebill
The shoebill is one of Uganda’s most sought-after birds. Mabamba Bay near Entebbe is a famous location, while Murchison Falls National Park and other wetlands may also offer sightings.
A shoebill may remain still for long periods before striking at prey or changing position. Patience is essential.
Useful strategies include:
- Use a 300mm to 600mm lens.
- Keep shutter speed high enough for sudden movement.
- Focus on the eye.
- Include wetland vegetation in some compositions.
- Photograph vertical and horizontal formats.
- Watch for reflections.
- Keep the boat stable.
- Avoid loud conversation and sudden movements.
- Allow the local guide to control the approach.
- Do not surround or pressure the bird.
Because the shoebill has a distinctive shape, silhouettes can also work well during early or late light.
Photographing Wildlife from a Safari Vehicle
Vehicle-based photography offers comfort, safety, and access to wildlife. However, limited space, vibration, and restricted angles can create difficulties.
Communicate with your guide
Tell your guide what kind of photographs you hope to capture. A photography-aware guide can help position the vehicle with attention to light, background, and animal movement.
Clear requests are useful:
- “Could we move slightly forward?”
- “Can we position the sun behind us?”
- “May we wait here for a few minutes?”
- “Can you switch off the engine?”
- “Could we leave space in front of the animal?”
Always respect park rules and avoid pressuring the guide to disturb wildlife.
Switch off the engine when possible
Vehicle vibration can reduce sharpness, especially with long lenses. Ask the guide to switch off the engine when it is safe and practical.
Use a beanbag
Resting a lens on a beanbag stabilizes the camera and reduces fatigue. Never place the lens directly on a hard vehicle edge because vibration may affect sharpness.
Keep equipment organized
Inside the vehicle, store cameras where they cannot fall or be stepped on. Avoid leaving loose lens caps, batteries, or memory cards on seats.
Decide which lens you are most likely to need and keep it attached.
Do not change lenses unnecessarily
Dust can enter the camera during lens changes. Two camera bodies can help: one with a telephoto lens and another with a medium or wide zoom.
If you have one body, change lenses only when necessary and protect the camera from wind and dust.
Boat Safari Photography Tips
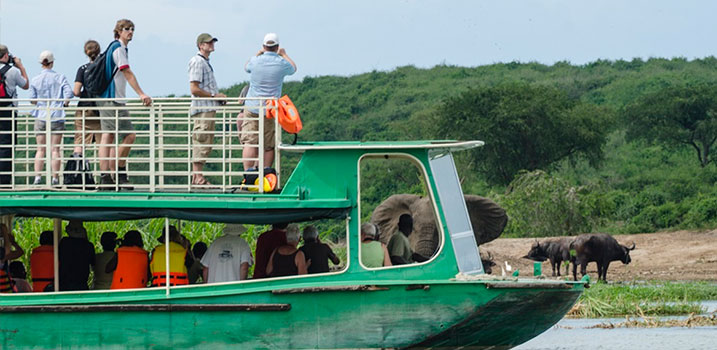
Boat safaris provide excellent access to hippos, crocodiles, elephants, waterbirds, buffaloes, and animals drinking along the shore.
Popular water-based experiences include the Kazinga Channel in Queen Elizabeth National Park, the Nile in Murchison Falls National Park, Lake Mburo, and Mabamba Bay.
Protect your equipment
Water spray and unexpected rain can damage cameras. Keep a rain cover or dry bag nearby.
Attach the camera strap securely, particularly when moving around the boat.
Use a fast shutter speed
Both the animal and the boat may be moving. Use a faster shutter speed than you would on land. A starting point of 1/1000 second is sensible for many situations.
For birds in flight, increase to 1/2000 second or faster.
Watch the background
Riverbanks may contain thick vegetation, other animals, boats, or bright patches of water. Adjust your position where possible to create a cleaner background.
Look for reflections
Calm water can produce beautiful reflections of birds, elephants, and other animals. Leave enough space beneath the subject to include the complete reflection.
Best Places for Wildlife Photography in Uganda
Each protected area offers different subjects, habitats, and photographic challenges.
Uganda Wildlife Photography Tips for Queen Elizabeth National Park
Queen Elizabeth National Park is one of Uganda’s most diverse safari destinations. It contains open plains, woodland, crater lakes, wetlands, and the Kazinga Channel.
Photographic subjects may include:
- Lions
- Leopards
- Elephants
- Buffaloes
- Uganda kob
- Hippos
- Crocodiles
- Hyenas
- Warthogs
- Waterbirds
- Tree-climbing lions in Ishasha
The Kasenyi Plains are productive for lions, Uganda kob, and open-landscape photography. Ishasha is known for lions resting in fig trees, although sightings are never guaranteed.
Use a medium telephoto zoom for elephants and large mammals. Keep a longer lens ready for distant predators and birds.
On the Kazinga Channel, photograph animals along the banks and watch for interactions between different species.
Photography in Murchison Falls National Park
Murchison Falls National Park combines classic wildlife, river scenery, dramatic landscapes, and birdlife.
Possible subjects include:
- Giraffes
- Elephants
- Lions
- Leopards
- Buffaloes
- Jackson’s hartebeest
- Oribi
- Patas monkeys
- Hippos
- Crocodiles
- Shoebills
- African fish eagles
- The Murchison Falls landscape
Northern game-drive areas provide open views and good morning light. The Nile offers close opportunities for waterbirds and large mammals.
At the falls, use a wide-angle or standard zoom to show the force of the river and surrounding landscape. Protect the camera from spray.
Wildlife Photography in Kidepo Valley National Park
Kidepo Valley National Park is remote, expansive, and visually dramatic. Its mountains, open plains, rocky outcrops, and dry riverbeds create some of Uganda’s strongest landscape-and-wildlife compositions.
Subjects may include:
- Lions
- Elephants
- Buffaloes
- Giraffes
- Zebras
- Cheetahs
- Ostriches
- Jackals
- Birds of prey
- Large herds in open landscapes
Kidepo is particularly suitable for environmental photography. Instead of using the longest lens for every image, include mountains, skies, plains, and seasonal colors.
Dust and heat haze can be challenging. Photograph early and late when temperatures are lower and light is softer.
Photography in Lake Mburo National Park
Lake Mburo National Park is relatively accessible from Kampala and offers a different photographic experience. It is known for zebras, impalas, elands, buffaloes, warthogs, giraffes, and birdlife.
Walking safaris can provide lower perspectives, although visitors must follow the armed guide’s instructions. Boat trips offer opportunities to photograph hippos, crocodiles, and waterbirds.
A 100–400mm lens is highly practical because wildlife may appear at varying distances.
Photography in Bwindi Impenetrable National Park
Bwindi is most famous for mountain gorillas, but its ancient forest also supports birds, butterflies, monkeys, and dramatic landscapes.
Conditions may include:
- Heavy shade
- Rain
- Steep trails
- Thick vegetation
- High humidity
- Rapidly changing light
Use weather-sealed equipment when available. Carry a rain cover even if the morning appears clear.
Wide-angle photographs can communicate the scale and mystery of the forest. Telephoto lenses are better for primates and distant birds.
Photography in Kibale National Park
Kibale is known as one of Africa’s leading primate destinations. In addition to chimpanzees, photographers may encounter red colobus monkeys, black-and-white colobus monkeys, red-tailed monkeys, blue monkeys, and grey-cheeked mangabeys.
The forest is dark, so fast lenses and cameras with reliable high-ISO performance are helpful. Because primates may move above you, check the background for bright sky that can confuse exposure.
Photography in Semuliki National Park
Semuliki offers a distinctive Central African forest environment. It is particularly attractive to bird photographers seeking species associated with the Congo Basin.
Photography can be demanding because of humidity, dense vegetation, low light, and small subjects. A long lens with good close-focusing ability is useful.
Bring rain protection and allow time for equipment to adjust gradually when moving between air-conditioned rooms and humid outdoor conditions.
Photographing the Big Five in Uganda
Uganda offers opportunities to photograph elephants, lions, leopards, buffaloes, and rhinos. Wild rhinos are mainly encountered at Ziwa Rhino Sanctuary, while the other four occur in national parks.
Lions
Photograph lions early or late when they are more active. Watch for yawning, grooming, family interaction, territorial behavior, and movement through grass.
If a lion looks likely to stand, prepare before it moves. Increase shutter speed and leave space in the direction it is facing.
Leopards
Leopards are secretive and often appear in difficult light. Use high ISO rather than allowing shutter speed to fall too low.
Look for a clear view of the eyes. If the leopard is in a tree, consider both tight portraits and wider frames that include branches.
Elephants
Elephants are excellent subjects for environmental photographs. Wide compositions can show their relationship with the landscape.
Watch for family behavior, dust bathing, drinking, feeding, and interaction between adults and calves. Never encourage the driver to block their path.
Buffaloes
Buffaloes have dark coats, which can challenge exposure. Slight positive exposure compensation may help, but check that bright horns and backgrounds retain detail.
Portraits of older buffaloes can reveal texture and character.
Rhinos
At Ziwa Rhino Sanctuary, visitors may photograph rhinos during guided tracking. Always obey the ranger and remain within the approved area.
A medium telephoto lens is often more useful than an extremely long lens. Capture full-body views, portraits, and habitat images without approaching independently.
Photographing Animal Behavior
Behavior gives wildlife photographs meaning. A technically perfect portrait is valuable, but an image of interaction often tells a stronger story.
Look for:
- Feeding
- Hunting behavior observed naturally
- Grooming
- Courtship
- Parenting
- Playing
- Drinking
- Territorial displays
- Alarm reactions
- Migration or group movement
- Communication
- Resting in unusual positions
- Interaction between species
Remain patient after capturing the first clear photograph. The most interesting moment may happen later.
Pay attention to visual clues. An alert posture, focused gaze, raised tail, change in direction, or sudden silence can signal approaching behavior.
Ethical Uganda Wildlife Photography Tips
Responsible photography protects animals, habitats, and local communities. A photograph is never more important than the welfare of its subject.
Keep a respectful distance
Do not ask guides to approach too closely. Long lenses exist partly to help photographers work from a safe and respectful distance.
Never block an animal
Do not position a vehicle across an animal’s path, surround it with several vehicles, or prevent access to water and shade.
Avoid disturbing young animals
Mothers with infants or calves may be especially sensitive. Give them additional space and avoid separating family members through vehicle positioning.
Limit noise
Speak quietly, turn off unnecessary camera sounds, and avoid sudden movements. Silent shutter mode can be useful, although rolling-shutter distortion may occur during very fast action.
Never feed wildlife
Feeding changes natural behavior, creates dependence, and may cause conflict between animals and people.
Follow drone regulations
Do not fly a drone without the required authorization. Drones may disturb wildlife, affect visitor privacy, and violate park or national aviation regulations.
Because rules can change, confirm current requirements with the relevant Ugandan authorities before travelling.
Respect people and communities
Ask permission before taking close photographs of local residents. Explain how the image may be used. Avoid treating people as decorations within a travel photograph.
When photographing ceremonies, homes, markets, schools, or children, follow local guidance and prioritize dignity and informed consent.
Safari Photography During Uganda’s Different Seasons
Uganda can be visited throughout the year, but weather influences road conditions, vegetation, animal distribution, and photographic style.
Drier periods
Drier conditions often make wildlife easier to locate near water. Vegetation may be thinner, while roads can be more manageable.
Potential benefits include:
- Clearer views of wildlife
- Easier road access
- More predictable game-drive conditions
- Animals gathering around water
- Golden grass and dust effects
Possible challenges include:
- Dust
- Harsh sunlight
- Heat haze
- Busy travel periods
- Dry or pale landscapes
Wetter periods
Rain transforms the landscape into deep shades of green. Migratory birds, dramatic clouds, reflections, and newborn animals may provide rewarding subjects.
Potential benefits include:
- Green vegetation
- Cleaner air
- Dramatic skies
- Softer light
- Colorful birdlife
- Fewer visitors in some locations
Possible challenges include:
- Muddy roads
- Rain on equipment
- Dense vegetation
- Lower light
- Difficult trekking conditions
- Insects and humidity
There is no universally perfect season. The best period depends on the animals, landscapes, and atmosphere you want to photograph.
How to Manage Dust, Rain, and Humidity
Uganda’s different environments require careful equipment protection.
Managing dust
Keep cameras covered when driving on dusty roads. Avoid changing lenses outdoors when another vehicle has recently passed.
Clean the exterior of the camera before opening battery or card compartments.
Managing rain
Use a fitted rain cover or protective bag. Keep microfiber cloths accessible. After returning to your lodge, dry the exterior carefully and allow equipment to air in a secure room.
Do not seal wet equipment inside an airtight bag for a long period.
Managing condensation
Condensation may form when a cold camera enters warm, humid air. Place the camera inside a sealed bag before changing environments and allow it to warm gradually.
Do not remove the lens while condensation is present.
Common Wildlife Photography Mistakes
Understanding common errors can improve your results quickly.
Using a shutter speed that is too slow
This is one of the most frequent mistakes. A photograph may look sharp on the camera screen but appear blurred on a larger display.
Increase ISO when needed to maintain a suitable shutter speed.
Photographing every subject too tightly
Extreme close-ups can remove the sense of place. Capture wider frames that show Uganda’s landscapes and habitats.
Ignoring the background
Check the entire frame, not only the animal. Bright objects and intersecting branches can distract from the subject.
Taking too many identical photographs
Continuous shooting is useful, but thousands of nearly identical images create unnecessary editing work. Use short bursts during meaningful action.
Changing settings too late
Prepare for likely movement. If an animal is resting, choose settings that can also handle it standing or walking suddenly.
Spending too much time reviewing images
Constantly checking the screen may cause you to miss behavior. Confirm exposure and sharpness periodically, then return your attention to the subject.
Forgetting to photograph the journey
Include roads, guides, vehicles, landscapes, camps, signs, conservation work, and small details. These images create a complete safari story.
Expecting perfect sightings
Wildlife photography involves uncertainty. Dense vegetation, poor light, distant animals, and quiet game drives are part of the experience.
Adapt to the conditions instead of judging the day only by famous species.
Photographing with a Smartphone on Safari
A smartphone is most successful when the animal is reasonably close or when the environment is an important part of the image.
Use these techniques:
- Clean the lens frequently.
- Use optical rather than digital zoom.
- Hold the phone with both hands.
- Brace it against the vehicle when possible.
- Tap the subject to focus.
- Reduce exposure slightly in bright scenes.
- Use burst mode for action.
- Record short, steady video clips.
- Avoid using flash around wildlife.
- Keep the phone attached with a secure strap during boat trips.
- Switch to airplane mode to conserve battery.
- Carry a power bank.
For gorilla trekking, protect the phone from rain and humidity. Do not step away from the group while trying to improve the angle.
Creating Video During a Uganda Safari
Video adds movement, sound, and atmosphere to your visual story. Record a mixture of wide, medium, and close scenes.
Useful clips include:
- Animals walking
- Birds taking flight
- Elephants drinking
- Primates feeding
- River movement
- Forest sounds
- Rain falling on vegetation
- Landscapes from a stationary viewpoint
- A safari vehicle moving through the park
- Short guide explanations, recorded with permission
Hold each shot for at least several seconds. Avoid rapid panning and excessive zooming.
Use stabilization, but remember that it cannot correct every movement. A monopod, beanbag, or supported position will improve results.
Record natural sound. Wind noise can be reduced with a suitable microphone cover.
Editing Uganda Wildlife Photographs
Editing should strengthen the photograph without misrepresenting the scene.
A practical workflow includes:
- Back up all files.
- Remove obvious mistakes.
- Group images by date and location.
- Mark the strongest images.
- Correct white balance and exposure.
- Adjust highlights and shadows.
- Apply lens corrections.
- Crop carefully.
- Reduce noise when necessary.
- Sharpen for the intended output.
- Export separate versions for web and print.
Keep colors believable
Uganda’s vegetation can appear intensely green. Avoid increasing saturation to the point that forests or grass look artificial.
Use noise reduction selectively
High-ISO forest photographs may require noise reduction. Apply enough to reduce distraction without removing important fur, feather, or skin texture.
Avoid excessive cropping
Heavy cropping reduces resolution and can reveal noise. When possible, improve framing in the field.
Preserve natural behavior
Do not combine animals from different photographs or remove major elements in a way that changes the meaning of a documentary wildlife image.
Basic removal of a small dust spot is different from constructing a scene that did not occur. Be transparent about significant digital changes.
Planning a Photography-Focused Uganda Safari
A standard safari and a photography-focused safari may follow different schedules.
Photographers often need:
- More time at each sighting
- Fewer rushed activities
- Early departures
- Flexible meal times
- Window access
- Limited passengers per vehicle
- A guide who understands light and positioning
- Enough baggage space for camera equipment
- Access to charging facilities
- Time for backups and equipment care
- Several nights in productive wildlife areas
Choose private or small-group travel
A private vehicle provides greater control over positioning and time. In a shared vehicle, different travellers may have competing interests.
If you join a group, choose one designed for photographers or confirm that participants understand the slower pace.
Request suitable vehicles
An open roof, large windows, accessible charging points, and adequate space can make photography easier. Ask how many photographers will share each row.
Spend more nights in fewer places
Moving every day reduces time in the field and increases fatigue. Staying for two or three nights in productive areas allows you to learn the location and respond to changing conditions.
Discuss baggage restrictions
Domestic flights may have strict baggage limits, particularly for soft-sided luggage. Confirm the current allowance before packing heavy lenses, tripods, and backup equipment.
Tell the operator your priorities
Explain whether you are most interested in:
- Mountain gorillas
- Chimpanzees
- Big cats
- Birds
- Landscapes
- Conservation
- Cultural photography
- Video
- A balanced portfolio
This information helps the operator select destinations, guides, vehicles, and activities.
Sample Uganda Wildlife Photography Packing List
Camera equipment
- Primary camera body
- Backup camera body if available
- Telephoto zoom
- Medium-range zoom
- Wide-angle lens
- Teleconverter if required
- Several memory cards
- Spare batteries
- Battery chargers
- Card reader
- Portable drives
- Camera rain covers
- Beanbag or monopod
- Lens and body caps
- Cleaning kit
- Camera straps
- Waterproof camera bag
Personal equipment
- Lightweight waterproof jacket
- Neutral-colored clothing
- Long trousers
- Comfortable walking boots
- Gardening-style gloves for forest treks
- Hat
- Sunscreen
- Insect repellent
- Reusable water bottle
- Small first-aid kit
- Binoculars
- Headlamp
- Power bank
- Travel adaptor
- Waterproof document pouch
Avoid overly bright clothing during forest activities. Comfortable, breathable layers are more practical than heavy garments.
Frequently Asked Questions About Uganda Wildlife Photography
What is the best lens for wildlife photography in Uganda?
A 100–400mm lens is one of the most versatile choices. It provides enough reach for many animals and remains flexible when wildlife comes closer.
Bird specialists may prefer 500mm or 600mm. Gorilla and chimpanzee photographers often find a 70–200mm or 100–400mm zoom useful.
Can beginners enjoy a photography safari in Uganda?
Yes. Uganda offers opportunities for every skill level. Beginners should learn basic exposure, autofocus, and shutter-speed controls before travelling.
A knowledgeable guide can help with animal behavior and vehicle positioning.
Is flash allowed during gorilla trekking?
Flash photography is not permitted around mountain gorillas. Prepare for low light with a wide aperture, higher ISO, and stable camera technique.
Can I use a tripod on game drives?
A full tripod is often difficult to use inside a safari vehicle. A beanbag or monopod is usually more practical.
A tripod can be useful for landscapes, lodge photography, night skies, and situations outside the vehicle where its use is permitted.
What camera settings should I use for gorillas?
A useful starting point is continuous autofocus, aperture around f/4 to f/6.3, shutter speed of approximately 1/500 second, and Auto ISO.
Adjust according to light and movement. Faster action requires a higher shutter speed.
What is the best time of day for wildlife photography?
Early morning and late afternoon generally provide softer light and greater animal activity. However, excellent behavior may happen at any time.
Is Uganda good for bird photography?
Yes. Uganda’s bird diversity and range of habitats make it one of Africa’s strongest bird photography destinations.
Do I need a professional camera?
No. A professional camera expands your technical options, but patience, composition, timing, and fieldcraft matter more.
Should I shoot RAW or JPEG?
RAW provides greater editing flexibility. RAW plus JPEG is useful if you need shareable files immediately, although it uses more memory.
Is a private vehicle necessary?
It is not essential, but it can significantly improve flexibility. You can remain longer at sightings and position the vehicle according to light and composition.
Can I photograph local communities?
Yes, but ask permission before taking identifiable close portraits. Respect anyone who declines and follow your guide’s advice.
Are drones allowed in Uganda’s national parks?
Drone use is controlled and normally requires authorization from relevant authorities. Never assume that recreational drone use is permitted.
Confirm the latest rules before travelling.
Advanced Uganda Wildlife Photography Tips
Experienced photographers can refine their work by concentrating on storytelling, light, and behavior rather than only species collection.
Build a visual sequence
Photograph the beginning, middle, and end of an event. For example, a sequence might show an elephant approaching water, drinking, interacting with another elephant, and walking away.
Use slower shutter speeds creatively
Once you have captured sharp images, experiment with panning. A slower shutter speed can keep part of a moving animal relatively sharp while blurring the background.
This technique requires practice and produces many unsuccessful frames. However, a successful result can communicate movement beautifully.
Experiment with high-key images
A pale sky, mist, or bright water can support a high-key composition. Increase exposure carefully while preserving essential subject detail.
Create low-key portraits
When an animal stands in a patch of light against a dark background, expose for the highlights. The surroundings may fall into shadow, creating a dramatic portrait.
Look beyond famous species
Small subjects often produce original images. Watch for:
- Insects
- Reptiles
- Amphibians
- Tracks
- Feathers
- Plants
- Spiderwebs
- Animal patterns
- Reflections
- Mud textures
- Relationships between wildlife and habitat
A complete portfolio should communicate the ecosystem, not only its largest animals.
Final Thoughts on Uganda Wildlife Photography Tips
Uganda rewards photographers who slow down, observe carefully, and remain open to unexpected moments. Its strength lies in contrast: dark primate forests, bright savannahs, quiet wetlands, mountain scenery, powerful rivers, and wildlife ranging from tiny sunbirds to enormous elephants.
The most valuable Uganda wildlife photography tips are also the simplest. Know your camera before the safari. Protect your equipment. Use an appropriate shutter speed. Focus on the eyes. Watch the background. Study animal behavior. Work closely with your guide. Most importantly, respect wildlife and never sacrifice animal welfare for a photograph.
Not every encounter will offer perfect light or a clean view. Nevertheless, challenging conditions can encourage more creative images. Rain can add atmosphere, clouds can soften the light, dust can create drama, and dense vegetation can communicate the mystery of a forest.
A successful Uganda photography safari should produce more than a collection of close animal portraits. It should tell the story of the country’s ecosystems, wildlife behavior, conservation importance, and remarkable natural character.
With careful preparation and ethical fieldcraft, these Uganda wildlife photography tips can help you return home with sharp images, stronger stories, and a deeper appreciation for the Pearl of Africa.
Plan Your Uganda Wildlife Photography Safari
Turn these Uganda wildlife photography tips into a professionally organized safari with Universal Ventures Rwanda. We arrange customized photography tours across Uganda and Rwanda for beginners, experienced photographers, birdwatchers, filmmakers, and private groups.
Our photography safaris can include mountain gorilla trekking in Bwindi or Mgahinga, chimpanzee tracking in Kibale, Big Five encounters, birdwatching, private game drives, boat safaris, comfortable accommodation, and experienced driver-guides. We can also design combined Rwanda–Uganda photography itineraries around your travel dates, preferred animals, photography interests, and budget.
Contact Universal Ventures Rwanda
- Email: info@universalventuresrwanda.com
- Telephone/WhatsApp: +250 781 441 853
- Address: KN 15 Road, opposite IPRC Entrance, 1st Floor, Sangwa Plaza, Kigali, Rwanda
- Website: Universal Ventures Rwanda
Contact our safari-planning team for a private Uganda wildlife photography safari, customized itinerary, accommodation recommendations, permit assistance, and professional ground transportation.