Skip to content
This Kenya Safari Photography Guide covers camera equipment, lenses, settings, composition, lighting, wildlife behavior, photography vehicles, the best Kenya photography destinations and practical advice for beginners and experienced photographers
A Kenya safari is one of the greatest opportunities a photographer can experience. Lions resting in golden grass, elephants walking beneath Mount Kilimanjaro, cheetahs accelerating across open plains, giraffes silhouetted against the evening sky and thousands of wildebeest moving through the Masai Mara create photographic possibilities that are difficult to match anywhere else.
However, extraordinary wildlife does not automatically produce extraordinary photographs.
Successful safari photography requires preparation.
You need to understand your camera before the first game drive. You need enough reach to photograph animals without getting close to them. You need fast shutter speeds when wildlife suddenly begins moving. Most importantly, you need patience, good light and a safari guide who understands how vehicle position affects a photograph.
Whether you are carrying a professional mirrorless camera, an entry-level DSLR or simply a smartphone, the principles remain similar: understand the light, anticipate wildlife behavior and be ready before the moment happens.
Why Kenya Is an Exceptional Wildlife Photography Destination
Kenya combines extraordinary wildlife diversity with dramatically different landscapes.
The Masai Mara offers vast grasslands, predators and seasonal migration activity.
Amboseli provides one of Africa’s most recognizable photographic settings, with elephants moving through open landscapes beneath Mount Kilimanjaro when visibility permits.
Samburu offers arid scenery and wildlife species associated with northern Kenya.
Lake Nakuru combines wildlife with lakeside and woodland environments.
Tsavo provides enormous wilderness landscapes, elephants and striking earth tones.
This variety allows photographers to build a portfolio containing far more than close-up animal portraits.
A single Kenya safari can produce wildlife portraits, action photographs, landscapes, silhouettes, environmental images, birds, dramatic skies and cultural photographs where appropriate and respectfully arranged.
Kenya Safari Photography Guide for Beginners
Your first wildlife safari can feel overwhelming.
Animals move unpredictably.
The vehicle may be moving.
Light changes constantly.
Other passengers may also be trying to photograph the same sighting.
The solution is not buying the most expensive camera available.
It is becoming comfortable with the camera you already own.
Before traveling, practice changing shutter speed, aperture, ISO, autofocus mode and exposure compensation without searching through menus.
Practice photographing moving subjects.
Birds, dogs, cyclists or local sports provide excellent training.
The objective is to make basic camera operation automatic.
When a cheetah suddenly begins running, you may have only seconds to react.
That is not the moment to learn where continuous autofocus is located.
Best Camera for Kenya Safari Photography
There is no single best safari camera.
Modern mirrorless and DSLR cameras from major manufacturers can all produce excellent wildlife photographs.
More important characteristics include reliable autofocus, good image quality at higher ISO settings, reasonable burst shooting and compatibility with useful telephoto lenses.
Mirrorless cameras have become particularly popular because of sophisticated subject-detection and eye-detection autofocus systems.
However, an older DSLR in experienced hands can still produce exceptional photographs.
Do not replace a camera you understand with an unfamiliar expensive camera immediately before your safari.
Familiarity often matters more than specifications.
Full-Frame vs Crop-Sensor Cameras
Both formats work well for Kenya wildlife photography.
Full-frame cameras often provide excellent low-light performance and image quality.
Crop-sensor cameras provide an apparent field-of-view advantage when using telephoto lenses, which can be useful for distant wildlife and birds.
For example, a lens that feels moderately long on a full-frame body may provide noticeably tighter framing on a crop-sensor camera.
Neither format automatically produces better wildlife photographs.
Choose the system that matches your budget, lenses and experience.
DSLR vs Mirrorless for Kenya Safari Photography
Mirrorless cameras offer several advantages for modern wildlife photography.
Electronic viewfinders can preview exposure.
Advanced autofocus systems can identify animals and eyes.
High burst rates can help capture action.
However, DSLRs remain extremely capable.
Battery life can also be excellent on many DSLR bodies.
If you already own a DSLR and understand it well, there is no need to change systems simply because you are traveling to Kenya.
Investing in a suitable lens may improve your safari photography more than replacing the camera body.
Best Lens for Kenya Safari Photography
Lens choice matters enormously.
Wildlife is often farther away than first-time safari travelers expect.
You cannot ask a lion to move closer because your lens is too short.
A flexible telephoto zoom is therefore one of the most valuable pieces of safari equipment.
For many photographers, a zoom reaching approximately 300–400mm provides an excellent starting point.
A 100–400mm lens is particularly versatile.
Longer zooms such as 150–500mm, 150–600mm, 180–600mm or similar ranges provide additional reach for birds and distant wildlife.
The exact options depend on your camera system.
Is a 70–200mm Lens Enough for Kenya Safari?
Sometimes, but it can be limiting.
Large animals may approach relatively close to the vehicle, particularly in productive wildlife areas.
A 70–200mm lens can produce excellent environmental portraits and close-range photographs.
However, smaller animals, birds and distant predators often require more reach.
If 200mm is your longest focal length, consider pairing it with another longer lens or compatible teleconverter where appropriate.
For photographers bringing only one wildlife lens, a longer zoom generally provides greater flexibility.
Is a 100–400mm Lens Good for Kenya Safari?
Yes.
A 100–400mm-class zoom is one of the most versatile safari lenses.
At the shorter end, you can photograph large animals relatively close to the vehicle.
At 400mm, you have enough reach for many more distant subjects.
It is also generally easier to handle inside a safari vehicle than an enormous prime lens.
For travelers who want excellent image quality without carrying excessive equipment, this focal range is extremely practical.
Is a 150–600mm Lens Good for Kenya?
A 150–600mm lens provides exceptional flexibility for wildlife and birds.
The additional reach can be particularly useful in Samburu, Lake Nakuru and the Masai Mara when animals are farther from the vehicle.
However, these lenses are larger and heavier.
Handling a heavy telephoto for several hours can become tiring.
A beanbag or other suitable vehicle support can make a significant difference.
Long focal lengths also magnify camera shake, making good technique increasingly important.
Wide-Angle Lenses for Kenya Safari Photography
Do not photograph every animal as tightly as possible.
Kenya’s landscapes are part of the story.
A 24–70mm or similar standard zoom is excellent for environmental wildlife photography.
Instead of filling the frame with an elephant’s face, photograph the entire herd crossing an open Amboseli landscape.
Show giraffes beneath a dramatic sky.
Capture a safari vehicle moving across distant grasslands.
Include the landscape around the animal.
These photographs often communicate a stronger sense of place than another tightly cropped portrait.
Should You Bring Two Camera Bodies?
If photography is a major reason for your safari and your budget permits it, two bodies can be extremely useful.
Mount a long telephoto on one camera and a shorter zoom on the other.
This eliminates frequent lens changes.
It also gives you backup if one camera develops a problem.
Dust is another reason.
Changing lenses repeatedly inside an open safari vehicle can expose your camera sensor to dust.
Two bodies reduce this problem.
However, casual photographers certainly do not need two cameras.
One body with a versatile zoom can be enough.
Camera Settings for Kenya Safari Photography
There is no single setting that works for every wildlife encounter.
A sleeping lion requires completely different settings from a running cheetah.
The key is understanding what each setting controls.
Shutter speed determines how movement is recorded.
Aperture affects depth of field and how much light enters the camera.
ISO controls the camera’s sensitivity or amplification and helps you maintain useful shutter speeds when light becomes limited.
Autofocus determines whether the camera can follow moving wildlife.
Learn how these settings interact before your safari.
Best Shutter Speed for Wildlife Photography
Shutter speed should reflect the movement of your subject.
A resting animal can be photographed at relatively moderate speeds.
For general moving wildlife, around 1/800 to 1/1000 second provides a useful starting point.
Fast action may require 1/1600, 1/2000 or faster.
Birds in flight can also require very fast shutter speeds.
Do not become obsessed with keeping ISO extremely low if doing so forces your shutter speed too slow.
A sharp image with some noise is usually more useful than a perfectly clean photograph ruined by motion blur.
Camera Settings for a Running Cheetah
Cheetahs demand fast settings.
Begin with continuous autofocus.
Use high-speed burst shooting.
Select a shutter speed around 1/1600–1/2500 second depending on light and movement.
Use an aperture that provides enough light while keeping the animal adequately sharp.
Auto ISO can be extremely useful because it allows the camera to adapt as the cheetah moves through changing light.
Begin tracking before the animal reaches full speed.
Continue following smoothly rather than reacting only after the sprint begins.
Camera Settings for Lions
A resting lion allows considerably more flexibility.
If the animal is relatively still, shutter speeds around 1/250–1/500 can work depending on focal length and camera stability.
When lions begin walking or interacting, increase the shutter speed.
Focus on the eye closest to the camera.
For portraits, wider apertures can create attractive background separation.
For several lions positioned at different distances, stop the lens down enough to increase depth of field.
Camera Settings for Elephants
Elephants appear slow but constantly move their ears, trunks and feet.
A shutter speed around 1/500 or faster is a useful starting point for moving elephants.
Increase it when calves are playing or herds are moving quickly.
Do not photograph only close-ups.
Elephants are perfect subjects for environmental compositions.
Include acacia trees, dust, mountains, clouds or other elements that communicate the scale of the landscape.
Camera Settings for Birds
Bird photography usually requires longer focal lengths and faster shutter speeds.
For a stationary bird, you can use moderate shutter speeds when the camera is well supported.
For birds in flight, begin around 1/1600–1/2500 second or faster depending on wing movement and available light.
Use continuous autofocus.
Burst shooting improves the chance of capturing an ideal wing position.
Leave additional space around a flying bird so you do not constantly crop wings out of the frame.
Continuous Autofocus
Continuous autofocus is one of the most important settings for wildlife photography.
Different camera manufacturers use different names, but the principle is the same.
The camera continuously adjusts focus as the subject changes distance.
This is essential for walking lions, running antelope, flying birds and almost every unpredictable wildlife situation.
Modern cameras may also provide animal or eye-detection autofocus.
Test these features before your trip.
Do not assume the camera will automatically understand every wildlife scene.
Focus on the Eyes
The eye is usually the most important focus point in an animal portrait.
Viewers naturally look toward the animal’s eyes.
If the nose is sharp but the eyes are noticeably soft, the image often feels unsuccessful.
When the animal is positioned at an angle, prioritize the eye nearest the camera.
Eye-detection autofocus can help, but always check whether the camera has actually selected the correct subject.
Burst Mode
Continuous burst shooting is valuable for action.
A running cheetah changes body position every fraction of a second.
Bird wings move rapidly.
Lions interacting can produce expressions that disappear instantly.
Burst mode increases your chance of capturing the ideal moment.
However, do not hold the shutter continuously throughout an entire sighting.
You will create thousands of nearly identical images and fill memory cards unnecessarily.
Use controlled bursts when meaningful action occurs.
Auto ISO for Wildlife Photography
Auto ISO can be extremely useful on safari.
You choose the shutter speed and aperture required for the photograph while allowing the camera to adjust ISO as light changes.
This works particularly well during early morning drives when conditions can change quickly after sunrise.
Set a reasonable maximum ISO according to your camera’s capabilities.
Modern noise-reduction software can handle high ISO surprisingly well, so prioritize a sharp photograph.
Aperture for Wildlife Photography
Wide apertures such as f/4 or f/5.6 can isolate an animal against a soft background.
This works beautifully for portraits.
However, wide apertures provide limited depth of field.
If several animals are standing at different distances, stopping down to f/8 or beyond may keep more subjects sharp.
For landscapes and environmental scenes, f/8–f/11 can provide greater depth.
The correct aperture depends on what you want the photograph to communicate.
Exposure Compensation
Wildlife photography often involves difficult backgrounds.
A dark buffalo against bright grass can confuse automatic exposure.
A pale animal against a dark background creates the opposite challenge.
Exposure compensation lets you quickly tell the camera to make the image brighter or darker.
Learn how to change it without taking your eye away from the viewfinder.
This small skill can save many photographs.
Photographing in RAW
If your camera supports RAW files and you are comfortable editing photographs, RAW provides maximum flexibility.
RAW files preserve more image information than JPEG files.
This can help recover shadow detail, control highlights and adjust white balance later.
The disadvantage is larger file size.
Bring sufficient memory cards and backup storage.
Beginners who do not want to edit extensively can use JPEG or RAW+JPEG.
Golden Hour Safari Photography
Early morning and late afternoon are usually the most attractive periods for wildlife photography.
The sun sits lower in the sky.
Light becomes warmer and more directional.
Shadows create depth.
Animals can also be more active than during the heat of midday.
This is why serious photography safaris often leave camp very early and remain in the field into the evening.
Do not sleep through sunrise simply because you are on holiday.
Those first hours can produce your strongest images.
Backlighting Wildlife
Backlighting occurs when the light comes from behind the animal.
Used badly, it can produce an underexposed subject.
Used creatively, it can create spectacular photographs.
Dust becomes golden.
Animal fur develops a glowing rim.
Elephant ears can become translucent.
Breath may become visible in cool morning air.
Expose carefully and watch the background.
Backlighting can transform an ordinary sighting into something memorable.
Silhouette Photography
Kenya’s open landscapes provide excellent opportunities for silhouettes.
Look for recognizable animal shapes against a bright sunrise or sunset.
Giraffes, elephants and acacia trees work particularly well.
Expose for the bright sky rather than the animal.
The subject then becomes dark while the sky retains its color.
Simple compositions usually work best.
Midday Wildlife Photography
Midday light is often less flattering because the sun is high and shadows become harsh.
That does not mean you should stop photographing completely.
Look for animals in shade.
Photograph behavior rather than perfect portraits.
Use the opportunity for birds, close details or black-and-white possibilities.
Cloud cover can also transform midday conditions by softening the light.
Wildlife does not follow a photographer’s schedule, so remain ready.
Composition in Safari Photography
Technical perfection alone does not create an interesting photograph.
Composition determines how the viewer experiences the image.
Avoid placing every animal directly in the center.
Give animals space in the direction they are looking or moving.
Pay attention to backgrounds.
A distracting vehicle, tree branch or bright object behind an animal can weaken an otherwise excellent photograph.
Small changes in vehicle position can dramatically improve composition.
Communicate with your guide when possible.
Rule of Thirds
The rule of thirds provides a simple starting point.
Imagine the frame divided into thirds horizontally and vertically.
Place important elements near these lines or intersections.
An animal looking to the right can be positioned toward the left side of the frame, leaving space in front of its gaze.
This creates a more natural sense of direction.
Rules can be broken, but understanding them helps you make deliberate choices.
Environmental Wildlife Photography
Do not return home with thousands of photographs showing only animal faces.
Kenya is about landscapes as much as wildlife.
Show the environment.
Photograph a small elephant beneath an enormous sky.
Include Mount Kilimanjaro behind an Amboseli herd when conditions cooperate.
Photograph giraffes between acacia trees.
Show wildebeest stretching across the plains.
Environmental photographs tell a more complete safari story.
Low-Angle Wildlife Photography
Lower camera positions can make wildlife photographs feel more intimate.
They place the viewer closer to the animal’s eye level.
However, your ability to shoot low depends on the vehicle and park rules.
Never leave the vehicle or move somewhere unsafe simply to obtain a lower angle.
Photography must always remain secondary to wildlife safety and conservation rules.
A photography-oriented safari vehicle can sometimes provide better low-angle opportunities without compromising safety.
Photographing Animal Behavior
Behavior is often more compelling than portraits.
Wait for interaction.
Lion cubs playing.
Elephants greeting one another.
Giraffes fighting.
A leopard climbing a tree.
Birds hunting.
Predators watching prey.
Behavior creates a story.
Instead of immediately taking hundreds of photographs when you reach a sighting, observe first.
Ask yourself what the animal might do next.
Preparation often produces better photographs than reaction.
Learn Wildlife Behavior
Understanding animals improves photography.
A bird preparing to fly may change posture.
A resting predator may suddenly become alert after noticing prey.
Elephants communicate through body language.
Cheetahs may scan their surroundings before moving.
You do not need to become a zoologist, but listening to an experienced guide helps you anticipate action.
When you know what might happen next, you can choose the appropriate shutter speed and composition before the moment occurs.
Patience Is a Photography Skill
Wildlife photography rewards patience.
The first position an animal gives you may not be the best.
Wait.
A lion may raise its head.
An elephant may move into better light.
A leopard may descend from a tree.
A bird may eventually take flight.
Photographers who constantly rush between sightings can accumulate many photographs without creating memorable ones.
Sometimes the best decision is to remain with one subject.
Best Safari Vehicle for Photography
Vehicle design matters.
A safari Land Cruiser with good visibility and sufficient room allows photographers to move and position equipment comfortably.
Pop-up roofs are common on Kenyan safari vehicles.
Dedicated photographic vehicles may provide specialized openings, supports or seating arrangements.
For serious photographers, private vehicle use is particularly valuable.
You can decide how long to remain at a sighting without negotiating with travelers who have different priorities.
Why a Private Safari Vehicle Is Better for Photographers
Photography requires time.
One traveler may want to spend 45 minutes waiting for a leopard to descend from a tree.
Another may take one phone photograph and want to leave immediately.
A private vehicle removes this conflict.
You and your guide can prioritize light, animal behavior and photographic opportunities.
You can also position camera equipment more comfortably without competing for space.
For dedicated photography trips, the private vehicle can be as important as the camera.
Beanbag vs Tripod on Safari
A beanbag is often more practical than a full tripod inside a safari vehicle.
It can support a telephoto lens on a window frame, roof opening or other suitable surface.
A tripod occupies significant space and can be awkward when wildlife suddenly appears on the opposite side of the vehicle.
Monopods can work in certain vehicles.
Ask your safari operator what support systems work best with their specific vehicles before packing heavy equipment.
Protecting Camera Gear from Dust
Dust is one of the biggest challenges on safari.
Keep cameras covered when not in use.
Avoid unnecessary lens changes during dusty game drives.
Carry a rocket blower and microfiber cloth.
Never aggressively wipe dusty glass before removing loose particles because this can scratch surfaces.
A simple cloth cover can protect a camera sitting beside you while the vehicle moves between sightings.
Clean equipment carefully at the lodge each evening.
Protecting Camera Gear from Rain
Weather can change quickly.
Carry a proper rain cover or waterproof camera bag.
A simple protective cover can allow you to continue photographing during light rain.
Keep spare batteries and memory cards inside waterproof pouches.
Do not assume a weather-sealed camera is waterproof.
Weather sealing provides protection but does not make electronic equipment invulnerable.
Memory Cards for Safari Photography
Bring more storage than you expect to need.
Wildlife action encourages high-speed burst shooting, which creates files quickly.
RAW files can also be large.
Use reliable, sufficiently fast cards.
Instead of relying entirely on one enormous card, many photographers prefer several cards so a single failure does not affect the entire trip.
Organize used and unused cards carefully.
Backing Up Safari Photographs
Back up your photographs regularly.
A laptop or portable storage device can provide a second copy.
Ideally, maintain images in at least two locations.
Do not immediately erase memory cards simply because photographs have been transferred once.
Storage is inexpensive compared with the cost and rarity of returning to recreate a once-in-a-lifetime wildlife encounter.
Camera Batteries
Bring spare batteries.
Cold mornings, continuous autofocus, electronic viewfinders, image stabilization and burst shooting all consume power.
Recharge batteries whenever you have the opportunity.
Some remote camps may have limited charging arrangements.
Ask your safari operator about electricity if you carry substantial photography equipment.
A multi-battery charger can save time.
Photographing the Great Migration
The Great Migration provides extraordinary photographic opportunities, but it can also be challenging.
Large herds create visual chaos.
Instead of trying to photograph everything, look for individual stories within the wider scene.
Use fast shutter speeds for running animals and river-crossing action.
A longer lens can isolate individuals.
A shorter lens can communicate the enormous scale of the herd.
Keep sufficient memory available because action can become intense quickly.
Photographing Mara River Crossings
River crossings require patience.
Wildlife may gather near the river without crossing immediately.
Nobody can guarantee exactly when a crossing will occur.
If action begins, use continuous autofocus and fast shutter speeds.
Think about more than tightly framed animals.
Wide compositions can show the scale of the event.
Look for water splashes, lines of animals descending the bank and interactions between wildlife.
Follow your guide’s instructions and respect park regulations and other vehicles.
Masai Mara Photography Guide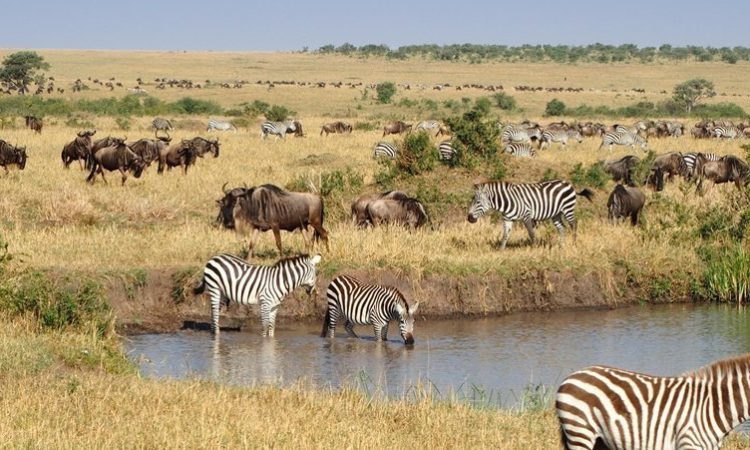
The Masai Mara is one of Kenya’s most famous wildlife photography destinations.
Open grasslands provide relatively clean backgrounds.
Predators including lions, cheetahs and leopards can provide exceptional photographic opportunities.
The migration season introduces enormous herds and potential river-crossing action.
However, the Mara deserves attention outside migration months as well.
Resident wildlife remains throughout the year.
Different seasons produce different grass colors, skies, lighting and photographic moods.
Amboseli Photography Guide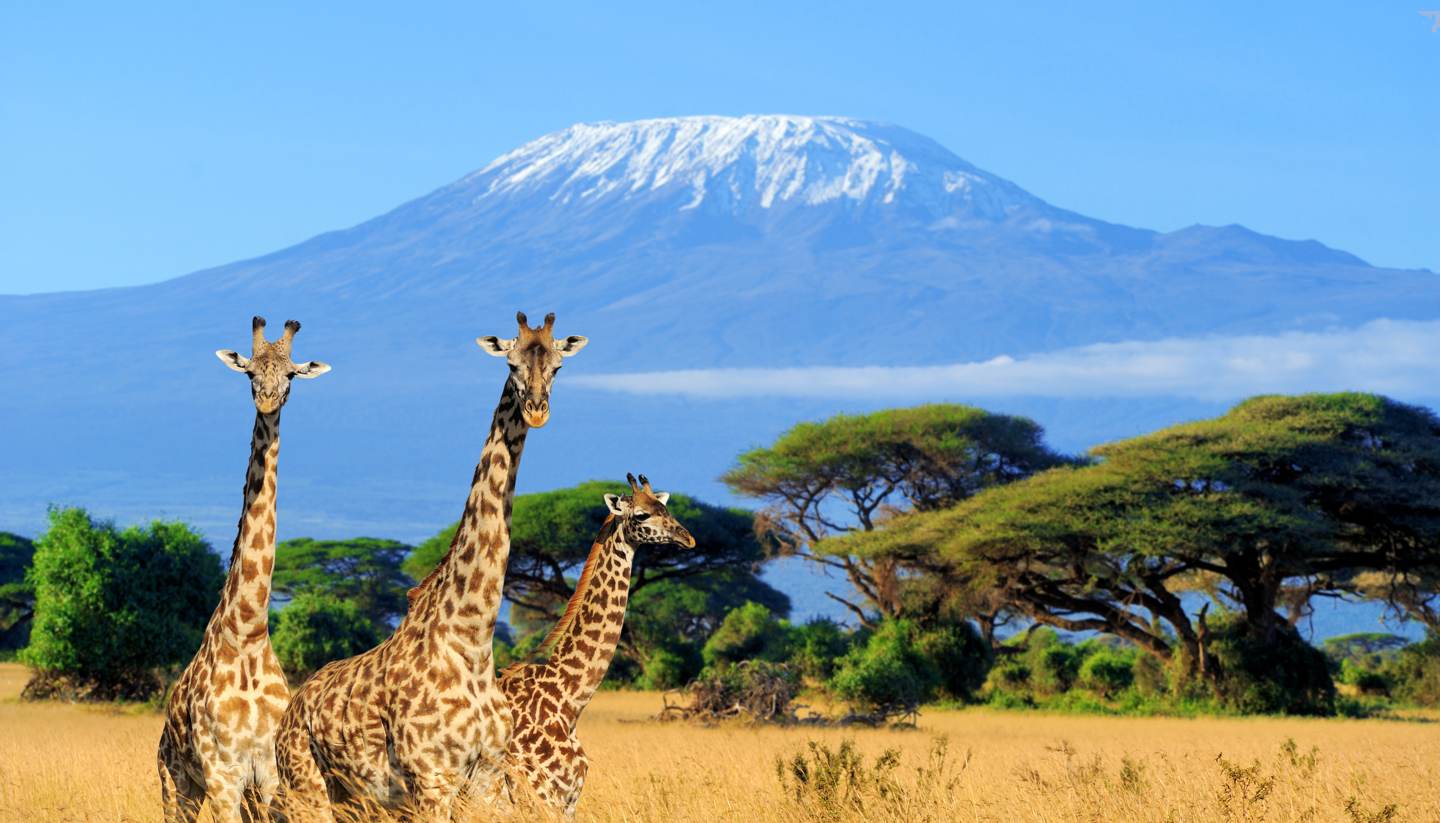
Amboseli offers a completely different visual identity.
Elephants are among its signature subjects.
When atmospheric conditions permit, Mount Kilimanjaro can create a spectacular background.
The challenge is composition.
Do not automatically zoom tightly into every elephant.
Wait for animals to move into positions that complement the landscape.
Dust can also become a creative element when illuminated by low sunlight.
Early mornings can provide especially attractive conditions.
Samburu Photography Guide
Samburu’s dry landscapes provide distinctive backgrounds and colors.
Wildlife associated with northern Kenya adds variety to a photographic itinerary.
Long lenses are particularly useful for birds and distant animals.
The region’s arid environment can create strong textures and minimalist compositions.
Look beyond conventional portraits.
Use landscape, vegetation and negative space creatively.
Lake Nakuru Photography Guide
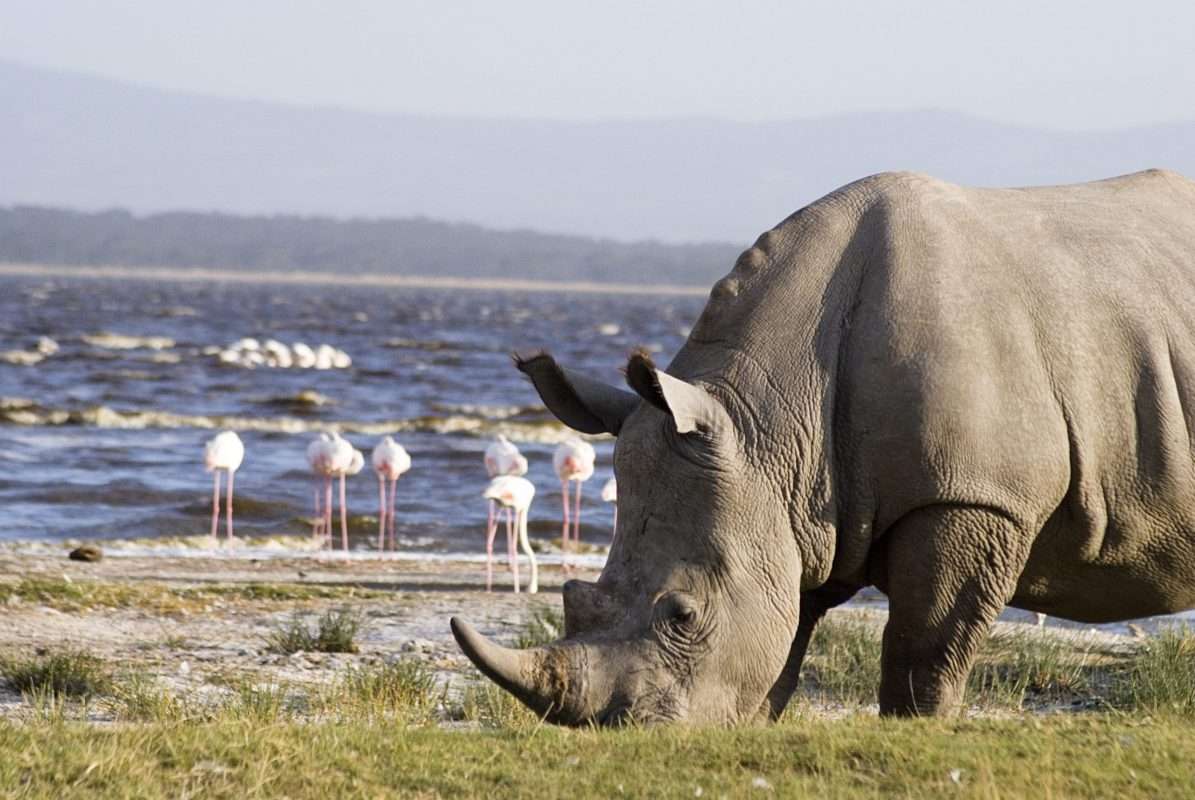
Lake Nakuru offers wildlife, birds and varied landscapes.
Telephoto lenses are useful for birds and distant subjects.
The surrounding woodland also provides opportunities for wildlife photographs with very different backgrounds from the open Mara.
Overcast conditions can work beautifully for birds because they reduce harsh highlights and shadows.
Keep an eye on exposure when photographing pale birds against dark water or vegetation.
Tsavo Photography Guide
Tsavo offers vast landscapes and a strong sense of wilderness.
Elephants, dramatic skies and distinctive earth tones provide excellent photographic possibilities.
Because of the scale of the environment, environmental compositions can be especially effective.
A long lens remains valuable, but do not forget your wider zoom.
Sometimes the strongest photograph is not the animal filling the frame but the animal appearing small within an enormous landscape.
Ol Pejeta Photography
Ol Pejeta can add another dimension to a Kenya photography itinerary.
Rhinos are a particularly important photographic subject in this region.
Treat wildlife respectfully and follow conservancy rules.
Use longer lenses to create strong portraits without demanding unnecessary proximity.
Also look for environmental compositions that show animals within the highland landscape.
Best Time for Kenya Safari Photography
There is no single perfect month for every photographer.
Different seasons create different opportunities.
Drier periods can provide open landscapes, concentrated wildlife activity around water and dusty golden backgrounds.
Greener periods can produce lush scenery, dramatic clouds and attractive contrast between animals and vegetation.
Migration-focused photographers may prioritize the period when large herds are typically present in the Masai Mara.
Bird photographers may prefer different seasonal conditions.
Choose your travel dates according to the images you want to create.
Photography During the Dry Season
Dry conditions can create beautiful golden and brown landscapes.
Dust illuminated by early or late sunlight can add atmosphere.
Animals may also become easier to see where vegetation is shorter.
The disadvantage is dust around camera equipment.
Carry appropriate cleaning equipment and avoid unnecessary lens changes.
Popular wildlife areas can also become busy during peak travel periods.
Photography During the Green Season
Green landscapes produce a completely different visual style.
Vegetation becomes richer.
Cloud formations can create dramatic backgrounds.
Rain can produce reflections and saturated colors.
Wildlife portraits against fresh green backgrounds can be striking.
Protect equipment from moisture and be prepared for changing road conditions.
Photographers willing to work with weather rather than against it can produce highly distinctive images.
Smartphone Safari Photography
You do not need a professional camera to enjoy safari photography.
Modern smartphones can create excellent images when animals are reasonably close.
Use the main camera rather than excessive digital zoom whenever possible.
Hold the phone steadily.
Tap the animal’s face to set focus and exposure.
Use burst mode for action if your device supports it.
Include landscapes rather than trying to turn every distant animal into a close-up.
A smartphone is particularly effective for video and wide environmental scenes.
Wildlife Photography with an iPhone or Android Phone
Clean the lens before every game drive.
This simple step dramatically improves image quality.
Avoid photographing through dirty vehicle windows when possible.
Use exposure adjustment when bright skies cause the animal to become too dark.
For video, move the phone slowly.
Rapid panning produces unpleasant footage.
If the animal is too distant for a good phone photograph, enjoy the sighting rather than destroying image quality with extreme digital zoom.
Safari Photography for Families
Children can enjoy photography without complicated equipment.
A basic camera or smartphone can encourage them to observe wildlife more carefully.
Instead of asking children to photograph everything, create simple challenges.
Photograph five different animal species.
Capture an animal looking directly toward the camera.
Create a silhouette.
Photograph something smaller than expected.
This transforms photography into part of the safari experience.
Ethical Wildlife Photography in Kenya
No photograph is worth disturbing an animal.
Never pressure a guide to move dangerously close.
Do not ask to block an animal’s route.
Avoid behavior that interferes with hunting, feeding, resting or caring for young.
Follow all park and conservancy rules.
Do not leave the vehicle where doing so is prohibited.
Respect other safari vehicles.
Responsible wildlife photography prioritizes the animal before the photograph.
Never Bait Wildlife for Photographs
Do not feed or bait wild animals.
Manipulating animal behavior for a photograph can be harmful and dangerous.
Wildlife images should document natural behavior.
An ethical photograph created patiently has greater value than an artificial scene produced by interfering with the subject.
Respect Other Photographers and Safari Vehicles
Popular sightings can attract multiple vehicles.
Do not pressure your guide to push in front of others.
Avoid blocking another vehicle unnecessarily.
Keep voices low around wildlife.
When you have obtained your photographs, consider allowing another vehicle an opportunity to position.
Respectful behavior improves the safari experience for everyone.
Common Kenya Safari Photography Mistakes
The first mistake is bringing equipment you do not understand.
The second is using shutter speeds that are too slow for moving wildlife.
Another is photographing every animal as tightly as possible.
Photographers also forget to check backgrounds, overuse burst mode and spend too much time reviewing photographs while the wildlife remains active.
Dust protection is frequently overlooked.
Finally, many travelers become so focused on taking pictures that they barely experience the sighting itself.
Occasionally lower the camera.
Watch.
Listen.
Enjoy being there.
Should You Rent Camera Equipment for a Kenya Safari?
Renting can make sense if you need a long lens only for the safari.
It can provide access to expensive equipment without requiring a permanent purchase.
However, rent early enough to practice before the trip.
Do not collect an unfamiliar professional camera system the evening before departure.
Understand the controls, autofocus and lens handling before your first game drive.
Photography Safari vs Regular Safari
A photography-focused safari operates differently.
Game drives may start earlier.
You may spend much longer with one animal.
Vehicle positioning becomes more important.
The guide needs to understand light direction and photographic angles.
A private vehicle may be used to provide additional space.
Photographers may also remain in the field through periods when conventional safari guests return to the lodge.
If photography is your primary objective, tell your tour operator before booking.
Private Kenya Photography Safari
A private safari provides the greatest flexibility.
You control the pace.
Your guide can position the vehicle according to your photographic needs within park rules.
You can remain with interesting behavior rather than leaving simply because a fixed itinerary says it is time to move.
The vehicle also provides more room for long lenses, camera bags and beanbags.
For serious photographers, this can significantly improve the experience.
Kenya Photography Safari Packing List
Keep equipment purposeful.
A practical photography kit might include one or two camera bodies, a telephoto zoom, a standard zoom, spare batteries, memory cards, a beanbag, cleaning equipment and protective covers.
Bring a laptop or backup device if file security is important.
A power bank can support phones and smaller electronics.
Keep essential camera equipment in carry-on luggage whenever airline regulations allow.
Check airline baggage and battery requirements before departure.
How Much Camera Gear Should You Bring?
Less than you think.
Too much equipment creates its own problems.
You spend time deciding which lens to use.
Heavy bags become difficult to manage.
Changing lenses increases dust exposure.
For many photographers, a 100–400mm or similar telephoto plus a 24–70mm-class lens covers the majority of safari situations.
Bird specialists may want additional reach.
Choose equipment according to your photographic priorities.
Photography Tips for First-Time Safari Travelers
Know your camera.
Use continuous autofocus for moving wildlife.
Keep your shutter speed high enough.
Watch the animal’s eyes.
Pay attention to the background.
Photograph both portraits and landscapes.
Be ready before action begins.
Listen to your guide.
Shoot during attractive light.
Protect your equipment from dust.
Most importantly, remain patient.
Wildlife photography is not simply about finding animals.
It is about waiting for the right combination of subject, behavior, background and light.
Frequently Asked Questions About Kenya Safari Photography
What is the best lens for a Kenya safari?
A flexible telephoto zoom reaching approximately 300–400mm or beyond is useful for most wildlife photography. A 100–400mm-class lens provides excellent versatility.
Is 300mm enough for a Kenya safari?
It can be sufficient for many larger animals, particularly when wildlife is relatively close. Birds and distant animals often benefit from additional reach.
Is 400mm enough for Masai Mara?
For many situations, yes. A 100–400mm-class zoom is one of the most practical choices for general wildlife photography.
Is 600mm too much for safari?
No. It can be extremely useful for birds and distant wildlife, although large lenses are heavier and require good handling technique.
Do I need two cameras?
No, but two bodies can reduce lens changes and provide backup for serious photography trips.
Do I need a tripod?
Usually not inside a standard safari vehicle. A beanbag or appropriate vehicle support is often more practical.
What shutter speed should I use for safari wildlife?
For general moving wildlife, around 1/800–1/1000 second provides a useful starting point. Faster action may require 1/1600–1/2500 or more.
Should I use Auto ISO?
Auto ISO can be extremely useful when wildlife and lighting conditions change rapidly.
Should I shoot RAW or JPEG?
RAW offers greater editing flexibility. JPEG requires less storage and processing. RAW+JPEG provides both at the expense of additional storage.
What is the best autofocus mode?
Continuous autofocus is generally the best choice for moving wildlife.
What should I focus on?
For wildlife portraits, prioritize the animal’s nearest visible eye.
When is the best light for safari photography?
Early morning and late afternoon generally provide softer, warmer and more directional light.
Can I photograph wildlife with a smartphone?
Yes. Smartphones work particularly well for nearby wildlife, landscapes, video and environmental photographs.
Is Masai Mara good for photography?
Yes. Its open landscapes, wildlife diversity, predators and seasonal migration activity provide extensive photographic opportunities.
Is Amboseli good for photography?
Yes. Amboseli is particularly known for elephant photography and expansive landscapes with Mount Kilimanjaro as a potential background.
How do I protect my camera from dust?
Keep unused equipment covered, minimize lens changes, use a blower and microfiber cloth and clean equipment carefully after game drives.
How many memory cards should I bring?
Bring considerably more storage than you expect to use and, where practical, divide images across multiple reliable cards.
Should I bring spare batteries?
Yes. Wildlife photography, autofocus and continuous shooting can consume batteries quickly.
Can beginners take good safari photographs?
Absolutely. Understanding a few essential settings and knowing your existing camera well matter more than owning the most expensive equipment.
Is a private vehicle worth it for photography?
For serious photographers, it can be extremely valuable because it provides greater control over time, vehicle positioning and equipment space.
Planning a Kenya Photography Safari
Start by deciding what you most want to photograph.
If big cats and open savannah are the priority, spend substantial time in the Masai Mara.
If elephants and dramatic landscapes are central to your vision, include Amboseli.
Bird and wildlife photographers can add Samburu, Lake Nakuru or other suitable destinations.
Do not attempt to visit every park simply because it appears on a standard itinerary.
Photography improves when you have time.
Spending three or four days in one productive wildlife area can produce better photographs than racing through several destinations.
Choose a private vehicle where your budget permits.
Tell your guide that photography is important.
Plan game drives around early and late light.
Bring equipment you understand.
Then allow wildlife to determine the photographs.
Final Thoughts on Kenya Safari Photography
The most important lesson in this Kenya Safari Photography Guide is simple: equipment helps, but preparation, patience and observation create photographs.
A long lens cannot compensate for poor light.
An expensive camera cannot anticipate animal behavior for you.
Twenty frames per second cannot fix an uninteresting composition.
Learn your camera before traveling.
Use sufficiently fast shutter speeds.
Focus on the eyes.
Work with the light.
Watch the background.
Photograph landscapes as well as wildlife portraits.
Respect animals and park rules.
And give interesting sightings enough time to develop.
Kenya provides the subjects.
Your job is to be prepared when the moment arrives.
Plan Your Kenya Photography Safari with Universal Ventures Rwanda
Universal Ventures Rwanda organizes customized East African safari experiences for wildlife enthusiasts, photographers, couples, families and private groups.
A Kenya photography itinerary can focus on destinations such as the Masai Mara, Amboseli, Lake Nakuru and other wildlife areas before continuing into Rwanda or Uganda for a wider East African adventure.
Photography-focused itineraries can prioritize private safari vehicles, longer wildlife viewing opportunities and enough time in each destination to work with changing light and animal behavior.
Kenya can also be combined with Rwanda gorilla trekking, Akagera National Park, Nyungwe National Park, Lake Kivu and Uganda’s primate and wildlife destinations.
Contact Universal Ventures Rwanda
Universal Ventures Rwanda
Address: Kigali, Rwanda
Phone / WhatsApp: +250 781 441 853
Email: info@universalventuresrwanda.com
Contact our team with your travel dates, group size, preferred Kenya destinations and photography interests for a customized East African photography safari.